
Continuing with the DIY Halloween decorations, another project that my sister and I completed were our ‘Scary Street Signs’.
This is another pallet project inspired by Pinterest (you can see my Halloween board HERE). We used boards that were from a pallet we disassembled a couple weeks ago.

I used my dad’s table saw (I love that thing!) to cut each board in half (I used three boards total). After cutting them in half, I also cut one end of each board into an ‘arrow point’. On the opposite ends I cut random grooves to give the signs a more rough ‘spooky’ look.

For this project, my sister wanted to do a little color mixing with the paints we had. For the teal’ish color, we mixed a dark purple with a light turquoise. I already had an orange, but it was a little too bright for the look we were going for, so I added a few drops of black paint to make it a little darker. Lastly, we used the original purple paint as it was in the can. To keep it balanced, we painted two boards in each color.


After letting the colored paint dry, I used a pencil to write out the street names on each board. In the picture above, you can only see “Spooky St” on the teal one because the other two had too much glare.
From there, I painted to street names on each board. Some of the letters I had to go over twice. I also tried to add a couple small embellishments here and there to go along with the names of each street.
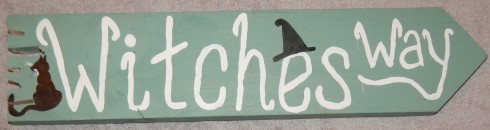
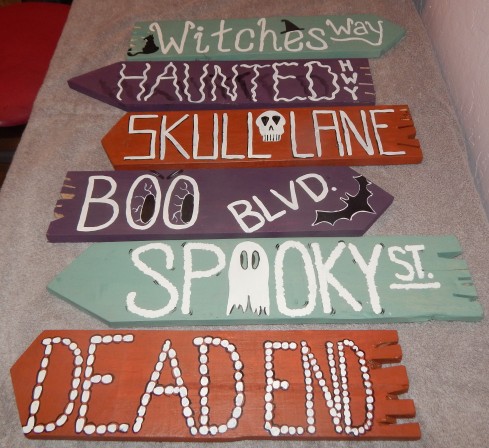
1.Witches Way – has a black cat and witches hat.
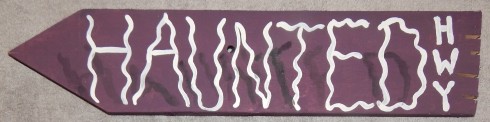
2. Haunted Hwy – has a watered down black “shadow”.
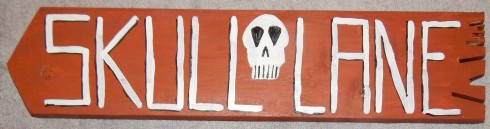
3. Skull Lane – has a skull. I also gave the letters a little bit of a ‘shadow’.
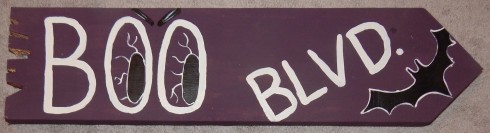
4. Boo Blvd – has some creepy eyes in the ‘O’s and a bat in flight.
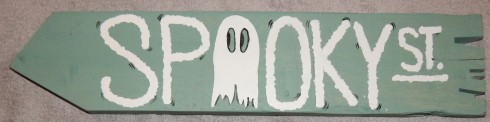
5. Spooky St – has a cute ghost in place of the first letter ‘O’.
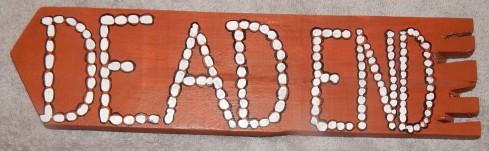
6. Dead End – has a sort of bubbled lettering outlined in black. I was trying to go for bone feel… as if the bones were all connected to each other… but it didn’t turn out quite the way I wanted. Oh well. Still looks good!
After all the lettering and embellishments were done, I set them out to figure out what order to put them in on the sign post… and here you go! They will be screwed onto a post and put up near the bottom of our driveway (down a short hill) so that people can see them as they go by! 🙂
Thanks for reading! I’ll keep you posted on any new projects.
You can also follow me on my Facebook page at: Emerald Studio 89
Please comment below and let me know if you have any questions! Thanks!!!
![]()
